Posted in crochet, Yarn

Twists and Plies — Part 2 of 2

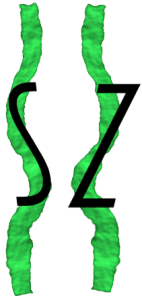
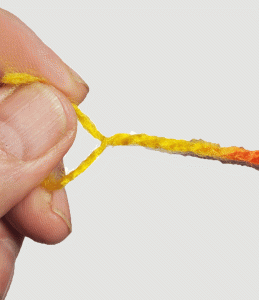
In the previous post, Twists and Plies Part 1, you read about twists as it pertains to yarn and how it affects crochet stitches. Another consideration is the ply of the yarn. As the yarn strand comes off the spinning wheel or machine, it is twisted to make it stronger or thicker. A yarn is plied when two or more strands are twisted together. These strands are twisted in the opposite direction than the way they came off the wheel. This means that if the original strand is twisted in a clockwise direction  (Z twist), then the strands are plied together in a counter-clockwise direction (S twist). The opposing twists keep the strands together.

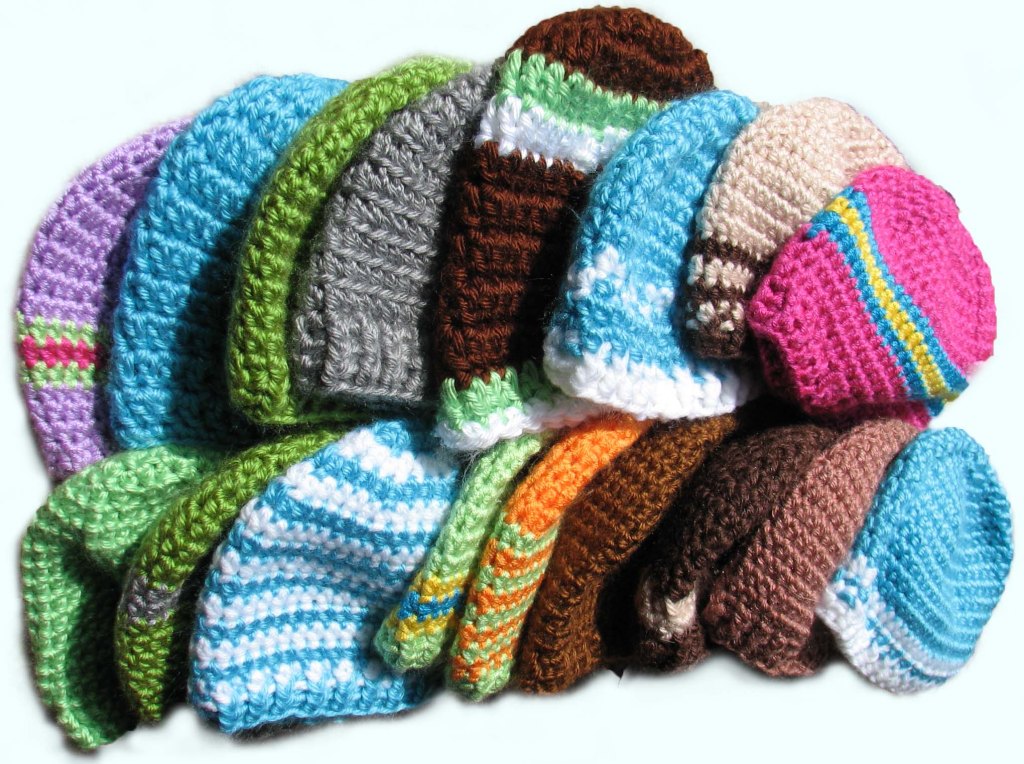
In the US, the number preceding the word “-ply” indicates the number of single strands of spun yarn that are twisted together. Some countries use it as a shorthand for the overall thickness of the yarn. As we will see, a large number of strands does not necessarily make up a thick yarn. Plying strands together can create a whole new look to the yarn with the addition of textures and colors. The addition of more strands enhances durability and sometimes weight. Many yarn enthusiasts can tell from the number of strands in the ply how well the finished item will turn out.

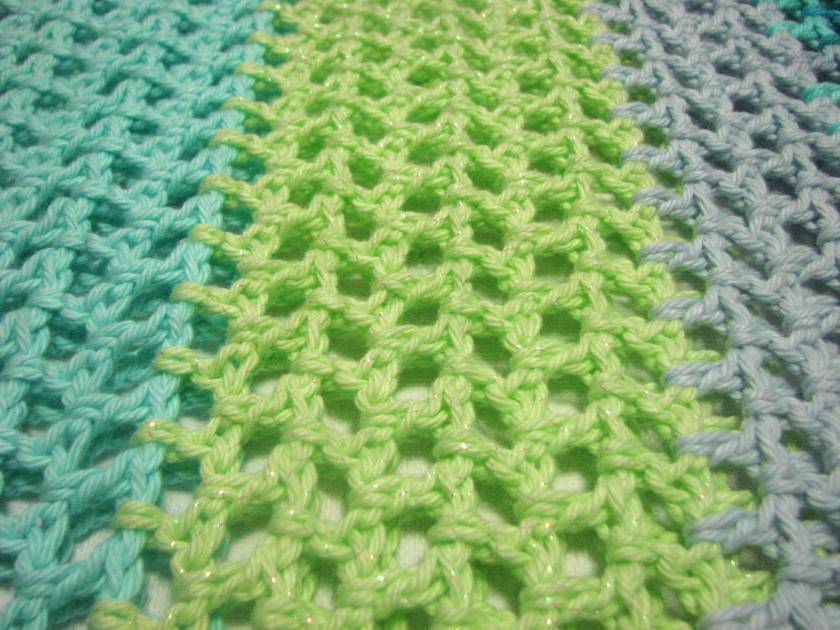
There is even a different shape to the yarn when looked at in cross-section, and this shape can affect stitch definition. Some examples include singles =roundish but flattens easily; 2-ply = oval, soft stitches; 3-ply = rounder but does not flatten.

Fingering weight singles

2-ply chunky weight

3-ply in chunky, worsted, and sport weights

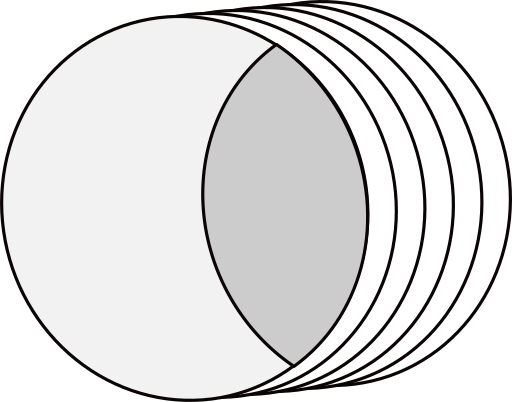
There are more types of plies like 4-ply, 5-ply and multiples; there is chain ply – also called chainette —  and cabled ply. Multiples generally are spun from very fine yarn in an S twist, then pairs of these are spun in a Z twist. Finally, the pairs are spun in 2s or 3s in another S twist. Even though these contain multiple strands of fiber, the overall weight is reduced because it starts with very fine yarn and includes a lot of air space. A single of the same size would consist of solid fiber instead. Chain plies are used with fibers with little elasticity, such as silk, linen, bamboo, and other plant fibers, because the construction gives the fiber a bit of stretch.

4-ply in worsted weights

Yarn with multiples, 12 altogether.

Cotton Classic with a chain ply which allows the cotton to be more elastic than a cotton like Sugar and Cream which is a 4-ply.

As you can guess, singles are much more likely to show signs of  weakness–you can pull the fiber apart from itself. They are susceptible to pilling and wear.  3-ply yarns are perfect for projects that get a lot of wear and abrasion, like socks. A recent trend has been to use yarns that are not plied at all but the strands simply lay next to each other.

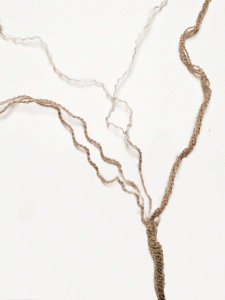
Unplied yarn, left Red Heart It’s A Wrap, right Katia

Posted in crochet, Crochet Technique

A Hat is Just a Tube

©Anna Murphy

The basic crocheted beanie begins at the crown and works down to the brim. With a few essentials in hand, you can crochet a beanie any size.

You begin with several stitches in the round, make an even number of increases for several rounds, then stop making increases.

Make evenly spaced increases based on the number of starting stitches.

You continue to work even around for the desired size.

Stop making increases and crochet evenly around for desired size.

Starting number of stitches

(depends on the height of the stitch):
* Single crochet = 6
* Half-double crochet = 8
* Double crochet = 12
You increase each round by the number of starting stitches. Example: You start with 8 hdc, so each round you add 8 more stitches.
round 1 = 8 total
round 2 = 16 total (2, 2, 2, etc.)
round 3 = 24 total (2, 1, 2, 1 etc.)
round 4 = 32 total (2, 1, 1, 2, 1, 1 etc.)
Can you see the pattern? What would round 5 look like?
round 5 =           total    (        ,         ,          ,         ,        ,        ,        ,        ) *answer below pattern

Basic Adult Beanie Pattern

A basic hdc beanie can be adapted in so many ways. You can adjust the height of the hat to make a rolled brim or one that does not cover the ears. This pattern uses hdc in spiraling rounds. Use a marker on the first stitch of the round, moving the marker with each new round.

Yarn:              approx. 110 yds worsted weight (#4) yarn

Hook:             H-8/5.0mm

Notions:         1 removable stitch marker, measuring tape, yarn needle, scissors

Gauge:             4” = 13 hdc x 12 rows

Hat size          7.5” high x 20.5” around, unstretched (26” stretched.)

Work in continuous spiral rounds, Do not join.

Rd 1     Ch 3, work 7 hdc in first chain made, do not join (8 hdc)

Place marker in first stitch of round. Move marker with each round

Rd 2     2 hdc in each st (16 hdc)

Rd 3     (2 hdc in first st, 1 hdc next st) 8 times (24 hdc)

Rd 4     (2 hdc first st, 1 hdc next 2 st) 8 times (32 hdc)

Rd 5     (2 hdc first st, 1 hdc next 3 st) 8 times (40 hdc)

Rd 6     (2 hdc first st, 1 hdc next 4 st) 8 times (48 hdc)

Rd 7     (2 hdc first st, 1 hdc next 5 st) 8 times (56 hdc)

Rd 8     (2 hdc in first st, 1 hdc next 6 st), 8 times (64 hdc)

Rd 9     Hdc in each st around. (64 sc)

Rd 10-23          Continue to hdc around, moving marker with each round; continue for desired size. Finish off. (64 sc)

Weave in ends.

The colors are just to help you follow the chart and do not indicate color changes. ©Anna Murphy

* Answer to Round 5

40 total (2, 1, 1, 1, 2, 1, 1, 1 etc.)

Head Circumference Chart

Courtesy of the Craft Yarn Council

https://www.craftyarncouncil.com/standards/head-circumference-chart

Infant/Child

CircumferencePreemieBabyToddlerChildTween
 (in.)9–1214–1616–1818–2020–22
(cm.)23–30.535.5–40.540.5–4645.5–5151–56

Adult

 CircumferenceWomanMan
 (in.)21–2322–24
(cm.)53–58.556–61

Chart and diagrams are copyrighted by Anna Murphy, 2022.

Do not reproduce the charts and diagrams. You may make one photocopy for personal use. Invite your friends to visit my site for their own copy. Thank you.

Posted in crochet, events

Fiber Fantasy, April 14-16, 2022

The Albuquerque Fiber Arts Council hosts an event every two years known as the Fiber Arts Fiesta. The fiesta is home to the host guilds’ booths, vendors, artist exhibits, educational displays, guild sponsored classes, and a charity booth. The beneficiary of the 2022 fundraiser is the Roadrunner Foodbank.

Each Fiesta has a theme, and Fiesta 2022 is billed as Fiber Fantasy. The participating guilds were tasked with presenting an educational display pertaining to a color or color scheme. The New Mexico Crochet Guild’s presentation was on Complementary Color combinations. As part of the display, the guild created an art piece of freeform crochet called Fantasy Garden and ran a continuous slideshow. The videos were created by Anna Murphy and narrated by Ronni Sparks.

COLOR THEORY: From Newton to Now
A brief explanation of the Complementary Color Scheme
COMPLEMENTARY COLOR THEMES: Choosing Yarn Colors

After the fiesta is over, I’ll be sure to post a gallery of photos. It has been a lot of work to plan this, but it has been fun and exciting to work with such dedicated volunteers. The Fiber Arts Council’s dedication and committment to the fiber arts community is so inspiring to the 19 guilds it supports.

The crochet guild is hosting a series of mini-classes during the event called the Crochet Cafe. Each session runs 15-20 minutes and is designed to give students a taste of crochet’s different techniques. Classes range from making simple stitches to keeping your edges square to simple Tunisian and more. Check out the Crochet Cafe.

The New Mexico Crochet Guild’s classes at the Fiber Arts Fiesta. Click the photo, then scroll down to see the class offerings.

Posted in crochet, Finished Objects

April in Paris Capelet pattern release

After much rewriting and testing, the April in Paris capelet pattern is finally available. I’ve listed it on Etsy since I’m not set up to sell on this blog. Many thanks to Melissa for her help in finalizing the pattern. This lovely yarn is hand dyed from The Little Weasel shop in Paris.

This yarn is Malabrigo “Sock”, and it has a lot more stretch to it than the Little Weasel yarn. I had to modify the neckline, but you don’t see that in this photo. I suggest when looking for yarn, choose one that is not very stretchy for best results. The Malabrigo was luscious to work with but didn’t give the same results. I did write in the modifications that I came up with for the neckline. I’m currently working on one in cotton, and I will post the results here. I suspect it will be very stretchy. Might have to go down a hook size.

Continue reading “April in Paris Capelet pattern release”
Posted in Craft tips, crochet, Crochet Technique

Follow up videos and instructions for Fiber Arts Fanatics

The following videos accompany the presentation to the GSNMT for the Fleece to Fashion program. Terms and instructions follow the videos

They are:

Making a slip knot

Holding your yarn like a pro

Chain stitch

Single crochet into the chain

Single crochet rows

Making a Slip Knot
Hold your yarn like a pro
Chain Stitch
Single Crochet into the chain
Single crochet rows

TermsInstructionsAbbreviation
The instructions assume that you are holding your yarn like a pro!
Yarn overPut your hook under the yarn from left to right (inside to ouside), rotate your wrist so that the yarn goes over  the hook.

Alternatively, use your hand to  “throw” the yarn over your hook, from right to left (outside to inside.)
YO
ChainInsert your hook under the yarn from left to right  (yarn over) and grab the yarn with the hook. Holding the loop that is on your hook with your left hand, pull the new yarn through the loop with your right hand.Ch
Single crochetInsert your hook into a stitch (chain or single crochet), yarn over and grab the yarn, then pull the yarn through the stitch. You now have 2 loops on your hook. Yarn over again and pull the yarn through both loops on your hook.Sc