Posted in Crochet Technique, Yarn

Twists and Plies: Part 1

Have you ever heard it said that a yarn with a tight twist makes for better crochet stitches? Read on to understand where that saying comes from.

One consideration when choosing yarn is the ability of the yarn to keep its shape within the stitches themselves. This is not the same as keeping its shape within the fabric, like with how drapey or stiff the fabric is. Rather, does the yarn hold up when creating each stitch?

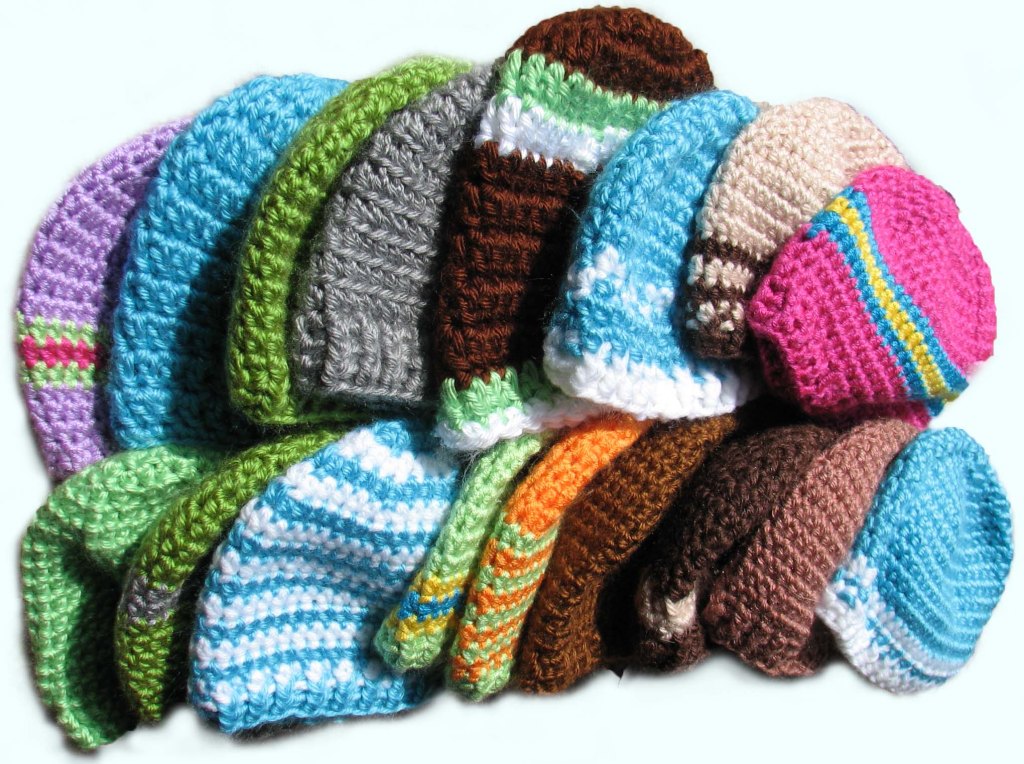
Some yarns create flimsy stitches, regardless of the size hook you use. Other yarns create stitches that just stand up and salute. Most of the time, this can be attributed to the twist of the yarn. The image of the single crochet fabric above shows neat stitches, but if you look closely, you can see some separation of the yarn fibers indicating a lightly twisted yarn. Why is that, and how can you tell when purchasing yarn?

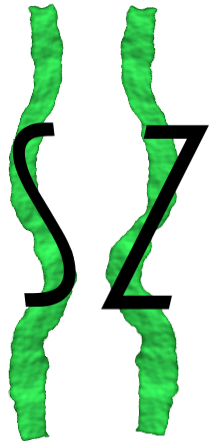
You may have heard the term “Z twist” or “S twist,” especially from spinners. Most commercial yarns are twisted in an S shape, that is, they are twisted in a counterclockwise turn. Z twist yarns are twisted in a clockwise turn.

If you are a right-handed crocheter, you make your yarn overs in a clockwise manner, and this has the effect of untwisting your S-twist yarn. If the yarn twist is very tight, the effect of untwisting is less noticeable, but if the twist if very soft, your yarn will become quite flat. This is why choosing a yarn with a tight twist will create crochet stitches that are very clean and pronounced. As you may have guessed, left-handed crocheters don’t have the same issue since they do their yarn overs in a counterclockwise direction.

The image with 2 yarns shows fairly common yarns with a moderate twist. The white yarn is a little fuzzy so the twist doesn’t show up well on camera.

These two moderately twisted yarns hold their shape during a yarn over.

The blue yarn has a very soft twist, as you will see in the next photos.

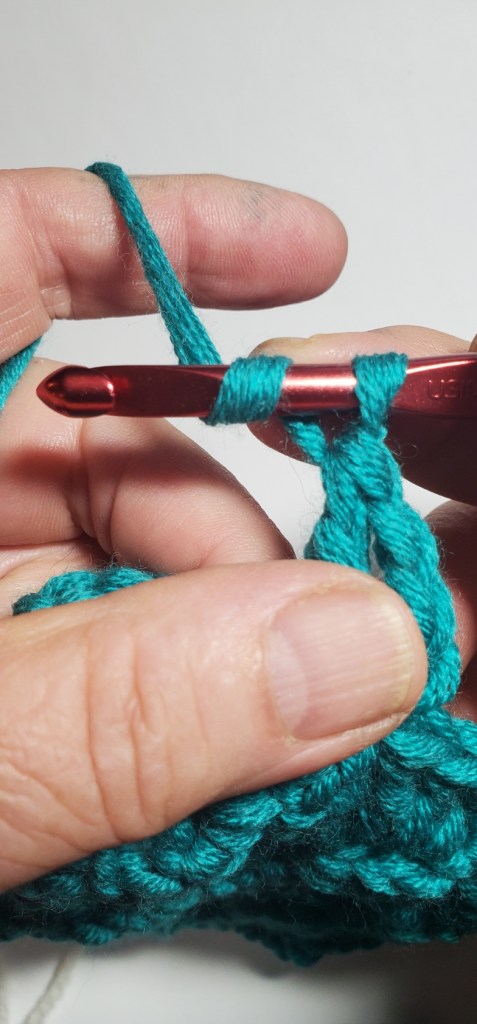
The image on the left shows what happens to the blue yarn with the soft twist during a normal yarn over. See how the yarn becomes untwisted and flat? On the right, the yarn is wrapped over the hook in the opposite direction and shows that the yarn stays twisted because of the direction in which it is wrapped. Right-handed crocheters don’t normally wrap the yarn in this direction, so the stitches end up being flattened.

If you want to test the twist on your yarn, take a short length of yarn and attempt to untwist it. If the strands come apart easily, it is a light or soft twist. If it takes a few turns to get them apart, that is a heavier, medium twist. If you have to have a third hand to get them to stay untwisted, that is a tight twist. If there is nothing to untwist, read Part 2 — the discussion on plies.

Posted in crochet, Crochet Technique

A Hat is Just a Tube

©Anna Murphy

The basic crocheted beanie begins at the crown and works down to the brim. With a few essentials in hand, you can crochet a beanie any size.

You begin with several stitches in the round, make an even number of increases for several rounds, then stop making increases.

Make evenly spaced increases based on the number of starting stitches.

You continue to work even around for the desired size.

Stop making increases and crochet evenly around for desired size.

Starting number of stitches

(depends on the height of the stitch):
* Single crochet = 6
* Half-double crochet = 8
* Double crochet = 12
You increase each round by the number of starting stitches. Example: You start with 8 hdc, so each round you add 8 more stitches.
round 1 = 8 total
round 2 = 16 total (2, 2, 2, etc.)
round 3 = 24 total (2, 1, 2, 1 etc.)
round 4 = 32 total (2, 1, 1, 2, 1, 1 etc.)
Can you see the pattern? What would round 5 look like?
round 5 =           total    (        ,         ,          ,         ,        ,        ,        ,        ) *answer below pattern

Basic Adult Beanie Pattern

A basic hdc beanie can be adapted in so many ways. You can adjust the height of the hat to make a rolled brim or one that does not cover the ears. This pattern uses hdc in spiraling rounds. Use a marker on the first stitch of the round, moving the marker with each new round.

Yarn:              approx. 110 yds worsted weight (#4) yarn

Hook:             H-8/5.0mm

Notions:         1 removable stitch marker, measuring tape, yarn needle, scissors

Gauge:             4” = 13 hdc x 12 rows

Hat size          7.5” high x 20.5” around, unstretched (26” stretched.)

Work in continuous spiral rounds, Do not join.

Rd 1     Ch 3, work 7 hdc in first chain made, do not join (8 hdc)

Place marker in first stitch of round. Move marker with each round

Rd 2     2 hdc in each st (16 hdc)

Rd 3     (2 hdc in first st, 1 hdc next st) 8 times (24 hdc)

Rd 4     (2 hdc first st, 1 hdc next 2 st) 8 times (32 hdc)

Rd 5     (2 hdc first st, 1 hdc next 3 st) 8 times (40 hdc)

Rd 6     (2 hdc first st, 1 hdc next 4 st) 8 times (48 hdc)

Rd 7     (2 hdc first st, 1 hdc next 5 st) 8 times (56 hdc)

Rd 8     (2 hdc in first st, 1 hdc next 6 st), 8 times (64 hdc)

Rd 9     Hdc in each st around. (64 sc)

Rd 10-23          Continue to hdc around, moving marker with each round; continue for desired size. Finish off. (64 sc)

Weave in ends.

The colors are just to help you follow the chart and do not indicate color changes. ©Anna Murphy

* Answer to Round 5

40 total (2, 1, 1, 1, 2, 1, 1, 1 etc.)

Head Circumference Chart

Courtesy of the Craft Yarn Council

https://www.craftyarncouncil.com/standards/head-circumference-chart

Infant/Child

CircumferencePreemieBabyToddlerChildTween
 (in.)9–1214–1616–1818–2020–22
(cm.)23–30.535.5–40.540.5–4645.5–5151–56

Adult

 CircumferenceWomanMan
 (in.)21–2322–24
(cm.)53–58.556–61

Chart and diagrams are copyrighted by Anna Murphy, 2022.

Do not reproduce the charts and diagrams. You may make one photocopy for personal use. Invite your friends to visit my site for their own copy. Thank you.

Posted in Craft tips, crochet, Crochet Technique

Follow up videos and instructions for Fiber Arts Fanatics

The following videos accompany the presentation to the GSNMT for the Fleece to Fashion program. Terms and instructions follow the videos

They are:

Making a slip knot

Holding your yarn like a pro

Chain stitch

Single crochet into the chain

Single crochet rows

Making a Slip Knot
Hold your yarn like a pro
Chain Stitch
Single Crochet into the chain
Single crochet rows

TermsInstructionsAbbreviation
The instructions assume that you are holding your yarn like a pro!
Yarn overPut your hook under the yarn from left to right (inside to ouside), rotate your wrist so that the yarn goes over  the hook.

Alternatively, use your hand to  “throw” the yarn over your hook, from right to left (outside to inside.)
YO
ChainInsert your hook under the yarn from left to right  (yarn over) and grab the yarn with the hook. Holding the loop that is on your hook with your left hand, pull the new yarn through the loop with your right hand.Ch
Single crochetInsert your hook into a stitch (chain or single crochet), yarn over and grab the yarn, then pull the yarn through the stitch. You now have 2 loops on your hook. Yarn over again and pull the yarn through both loops on your hook.Sc
Posted in Book Review, Craft tips, crochet, Crochet Technique

Want to Win the Crochet Jeopardy Game?

All you have to do is ask! So begins Edie Eckman’s best-selling book, The Crochet Answer Book. Subtitled, Solutions to Every Problem You’ll Ever Face, Answers to Every Question You’ll Ever Ask, this little book is one that every crocheter should have in their toolbox.

Every question, I ponder? Nobody says “every” and “all”. That’s hard to live up to. But Edie does a comprehensive and concise job of covering topics from choosing your yarn and hook to finishing. Her catchy chapter titles reel you in: Tense About Gauge; Going in Circles? . . . and Squares and Triangles; A Good Yarn. The Appendix is worth as much as the body of the book. One of my favorite pages there covers common crochet phrases, those sayings that people toss off and you’re left wondering, “What language are they speaking?” Finally, I found it interesting that in her section on reference books, she included this: “Any Japanese stitch dictionary or pattern book you can get your hands on.” My first foray into the world of charted patterns was from a Japanese pattern, so I can relate to her enthusiasm for them.

With cleanly drawn images of both right- and left-handed stitches and techniques, the book is easy to read. The use of wide margins makes it convenient for you to write in your own notes. And its small size – fits right in your hand – means you can keep it in your project bag without difficulty. Then, it is right there when you need it, when you have that question and need an answer. So grab your copy of The Crochet Answer Book today, and you’ll soon be winning the “Crochet Jeopardy” game. I’ll take “Why isn’t my circle round?” for $500, Edie.