© Anna Murphy, 2018
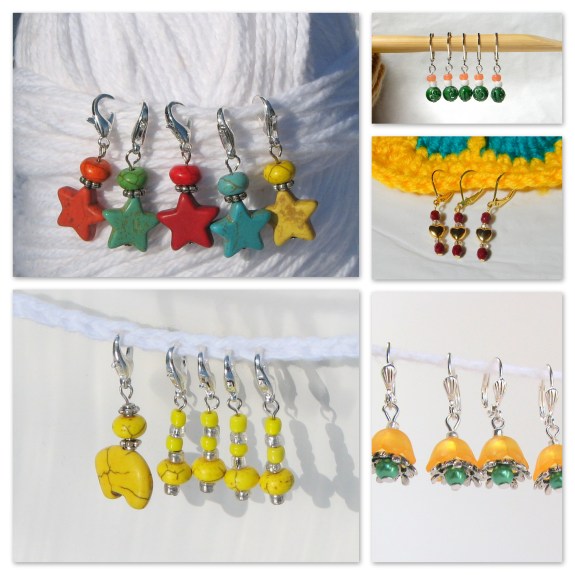
I am a fanatic about using stitch markers when I crochet. So it comes as no surprise to me when someone comments on all the stitch markers I have hanging on the shawl I’m working on. Often I’ll hear someone remark that they don’t know why they should use markers or even how to use them. I tell them I don’t know how they can crochet without them! I like them so much that I started making beaded ones to sell.

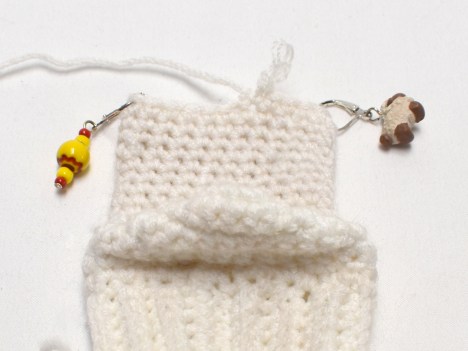
While knitters also use stitch markers, there is a huge difference in the ones needed for crochet. They can use rings which slip on and off the needle, but crocheters need removable stitch markers that can be put into a stitch. Many are made from plastic which have a habit of breaking or slipping out. Some that are beaded are attached to a lobster claw. I have made them that way too but find them more difficult to use than the ones that I make with leverback ear wires. My fingers have trouble opening the clasp, and they are too small to adequately go through a stitch, especially with bulkier yarns. Additionally, knitters can use the ear wire ones since the opening is large enough to slip on the needle.
Probably the most common use for stitch markers is to hold your last stitch when you take the hook out. Do you know that I actually don’t use a marker for this? I just pull up the loop and make a simple overhand knot with it. However, I do use them for counting repeats.
One example is if you are crocheting a long chain, you can put a marker every 20 or so stitches. This helps you keep track of how many you’ve made. Don’t you just hate it when you start counting your chain and you lose track of where you are! Well, if you have put markers in, you can go back to the last marker to pick up your count.
Another type of repeating marker is used when you have a repeating pattern. I was crocheting a shawl that had you put two double crochet every so often with a mesh stitch in between. The mesh would increase, but I always put the two double crochet in the same spot. With a marker in each 2dc, I knew to repeat that stitch. When I didn’t use a marker, I would forget to do that and ended up having to rip out the work. Once, on a shawl I had 16 markers for all the increases and decreases I was doing. You can see the finished shawl here on Ravelry http://www.ravelry.com/projects/abqmurphy/to-the-point

Speaking of ripping out, when I’m doing a complicated pattern, I will put a marker after about 50 stitches. Then I’ll crochet about 50 more and put a marker. Now, at this point, I will check my work between the two markers for errors. If I’m okay, I’ll take out the first marker, crochet another 50 or so stitches, and repeat the process of checking for errors. You will leapfrog the first marker over the second one, having only two markers at a time (unless you are also marking repeating patterns; in that case, you will want to use markers that are unique, like red ones for the pattern, green ones for the error checks.) This is so helpful especially if you are working in rows, because you know that you won’t see the error until you have gone to the end of the row, turned and come all the way back. Oops, there you go, having to rip out two rows. My suggestion is for you to decide how many stitches you are willing to rip out, then use the two-marker system to check your work.
There is another use for markers that I use a lot and that is for putting in gussets on gloves and socks. That’s where you make a temporary increase in the pattern, like to make room for the thumb. Or I’ll put markers on either side of the heel opening to keep track of the increases/decreases there. You can use a marker to indicate the right or wrong side, the center of something, and much more.